|
|
1 year ago | |
|---|---|---|
| 1.png | 1 year ago | |
| 2.png | 1 year ago | |
| 3.png | 1 year ago | |
| 4.png | 1 year ago | |
| 5.png | 1 year ago | |
| 6.png | 1 year ago | |
| 7.png | 1 year ago | |
| 8.png | 1 year ago | |
| 9.png | 1 year ago | |
| 10.png | 1 year ago | |
| 11.png | 1 year ago | |
| 12.png | 1 year ago | |
| 13.png | 1 year ago | |
| 14.png | 1 year ago | |
| 15.png | 1 year ago | |
| 16.png | 1 year ago | |
| 17.png | 1 year ago | |
| 18.png | 1 year ago | |
| 19.png | 1 year ago | |
| README.md | 1 year ago | |
| source_code.ino | 1 year ago | |
README.md
Microprocessor
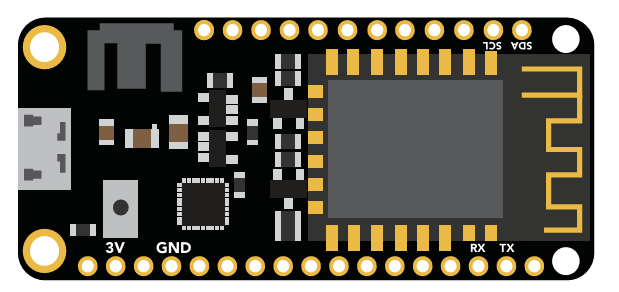
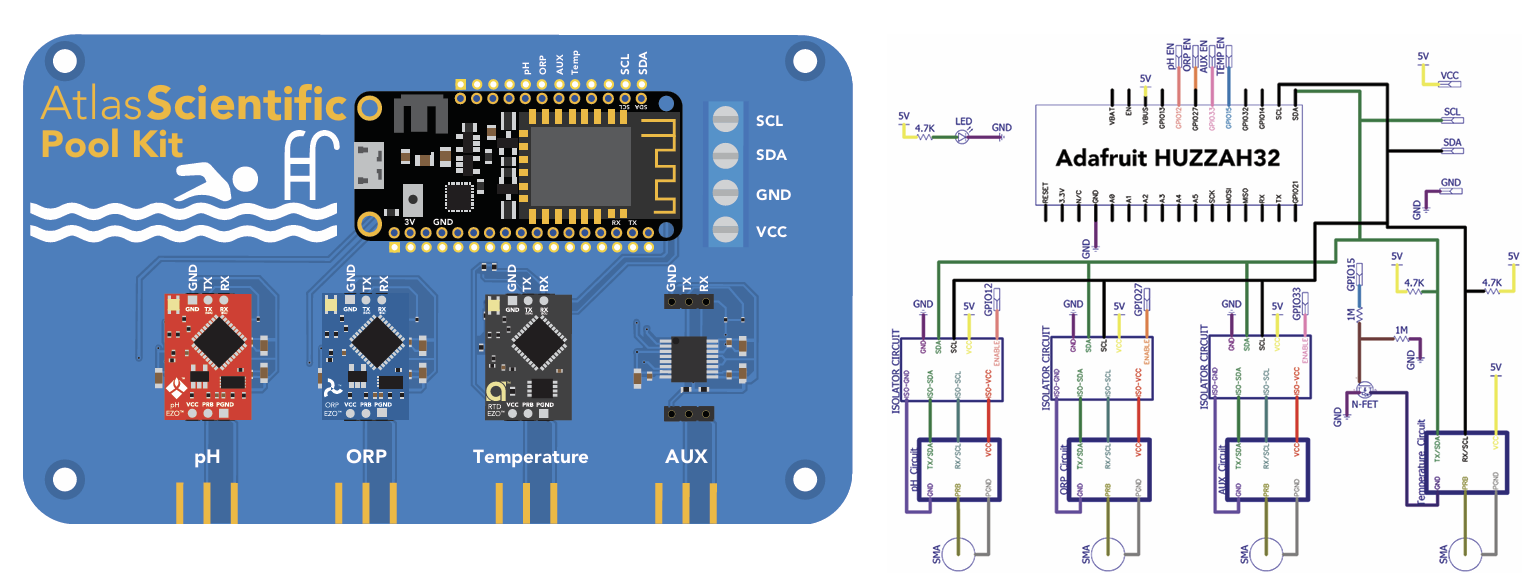
The Wi-Fi Pool Kit is controlled using an Adafruit Feather HUZZAH32 as its CPU. The HUZZAH is programmed using the Arduino IDE and uses an onboard ESP32 as its Wi-Fi transmitter.
PCB
The overall design of the PCB is quite simple. The CPU is powered and programmed through the panel-mount USB connector. The CPUs USB pin supplies the board's power bus with 5V.
Communication protocol
The CPU communicates with all peripheral sensors using the I2C data protocol. All data lines are directly connected to the CPUs I2C port. Using a different data protocol with this circuit board is not possible.
It is important to keep in mind that all Atlas Scientific components default to UART mode. When adding a new Atlas Scientific component to the kit, it must first be put into I2C mode.
Adding additional components of the same type, such as an additional pH or ORP sensor, is not hard to do. As mentioned above, you must set the device to I2C mode, and you must make sure that its I2C address is not the same as the already existing components.
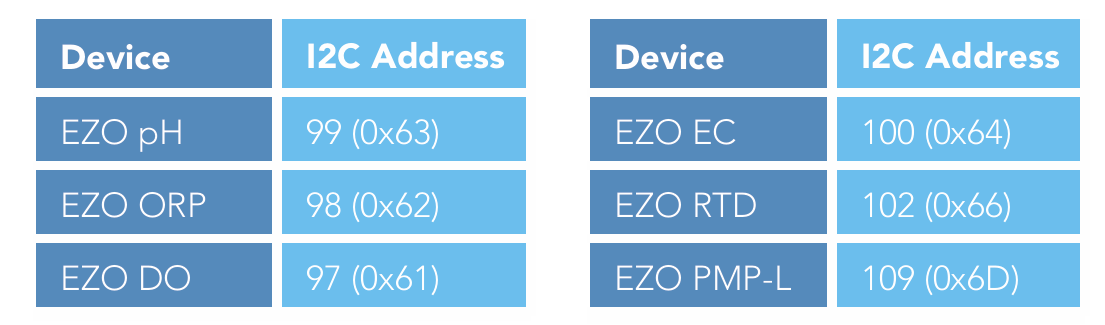
The next table lists the default I2C address of Atlas Scientific components commonly added to this kit.
Setting up the Wi-Fi Pool Kit
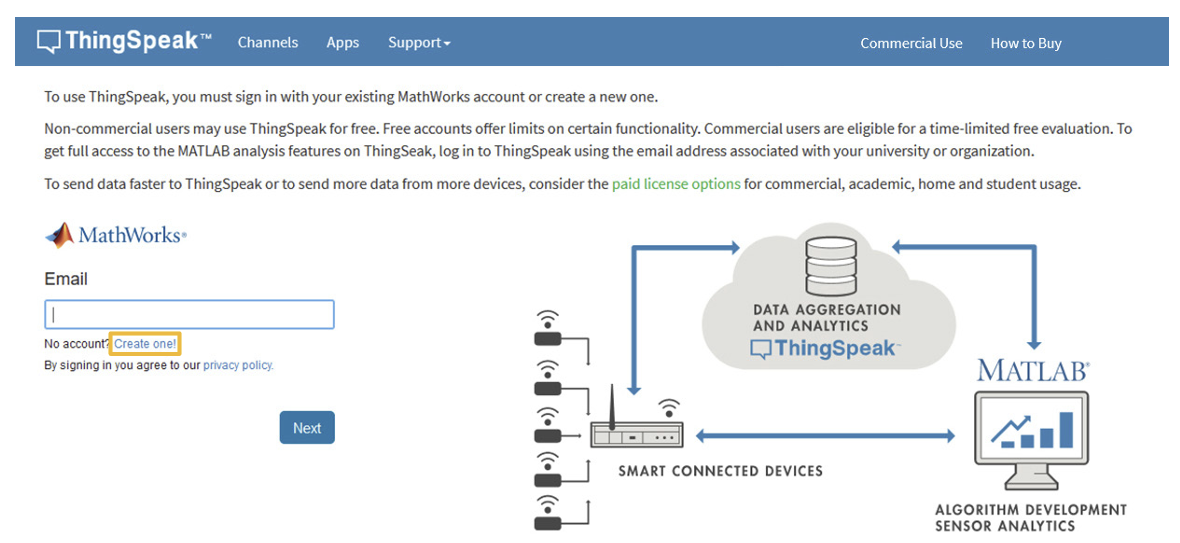
The Atlas-Scientific Wi-Fi Pool Kit has been designed to upload sensor data to the ThingSpeak website, a free, cloud-based data acquisition and visualization platform. You will be required to set up a free account with ThingSpeak to upload and visualize the data. With a free account, you can upload data once every 15 seconds.
Setup a ThingSpeak account
Because the sensor data is stored/viewed on the ThingSpeak website, you will need to setup a ThingSpeak account. Create your ThingSpeak account by using the next link: https://thingspeak.com/login
Create a channel
Your data is uploaded to ThingSpeak through a ‘Channel.’ Select New Channel:
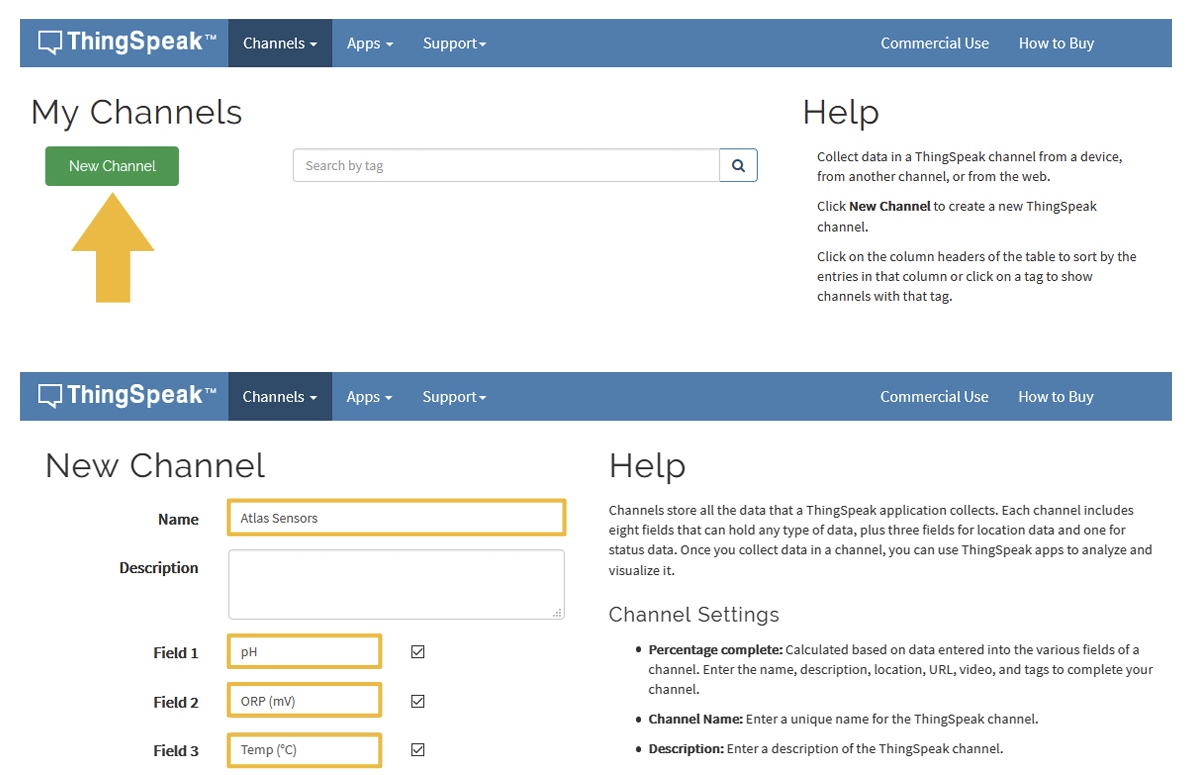
To finish this step, Scroll to the bottom of the page and click Save Channel.
Get ThingSpeak API keys
After you saved your channel settings, you will be redirected to your channel page. Click on API keys.
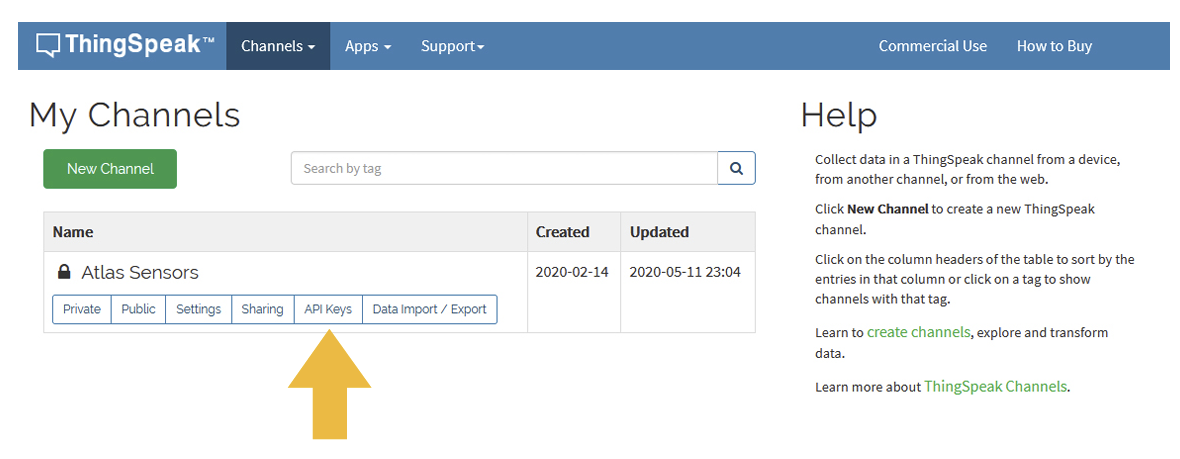
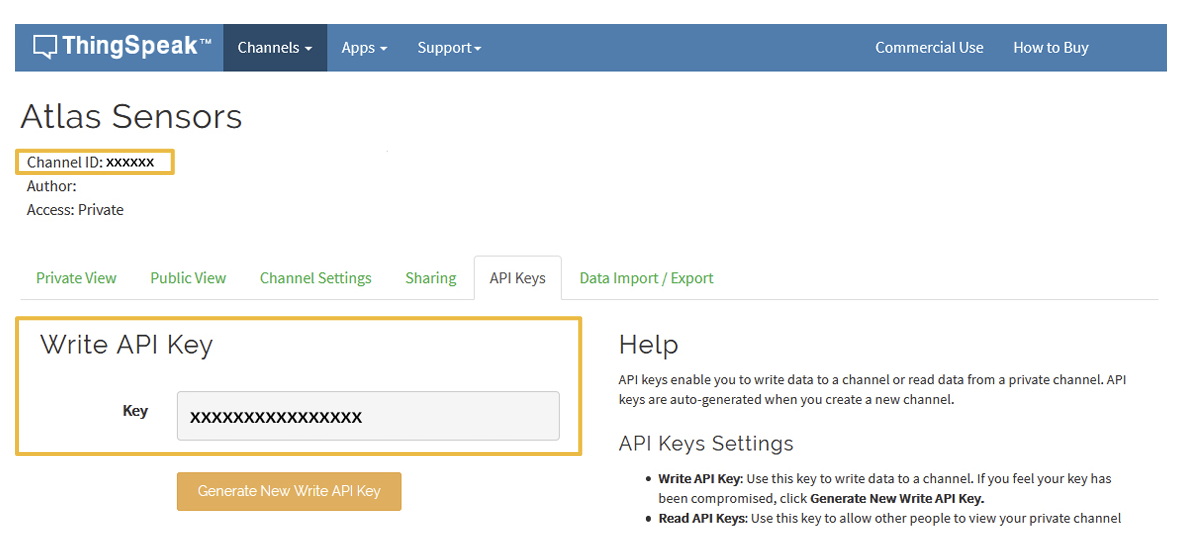
Be sure to save your Channel ID and Write API Key because we are going to need them in the next steps.
Arduino IDE libraries
You will have to make sure you have the correct path for the ESP32 Library.
In the Arduino IDE, go to File > Preferences.
Locate the Additional Boards Manager URLS text box.
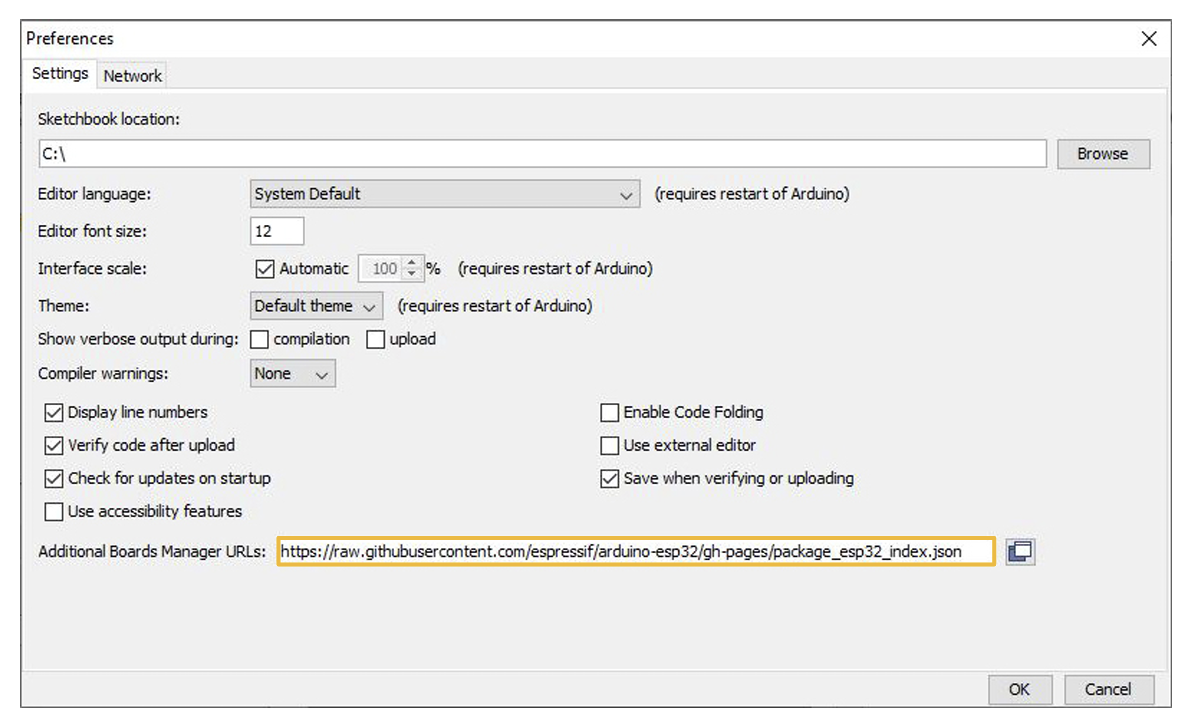
Make sure this URL is in the text box: https://raw.githubusercontent.com/espressif/arduino-esp32/gh-pages/package_esp32_index.json
Then, click OK.
Now, in the Arduino IDE go to Tools > Board > Boards Manager.
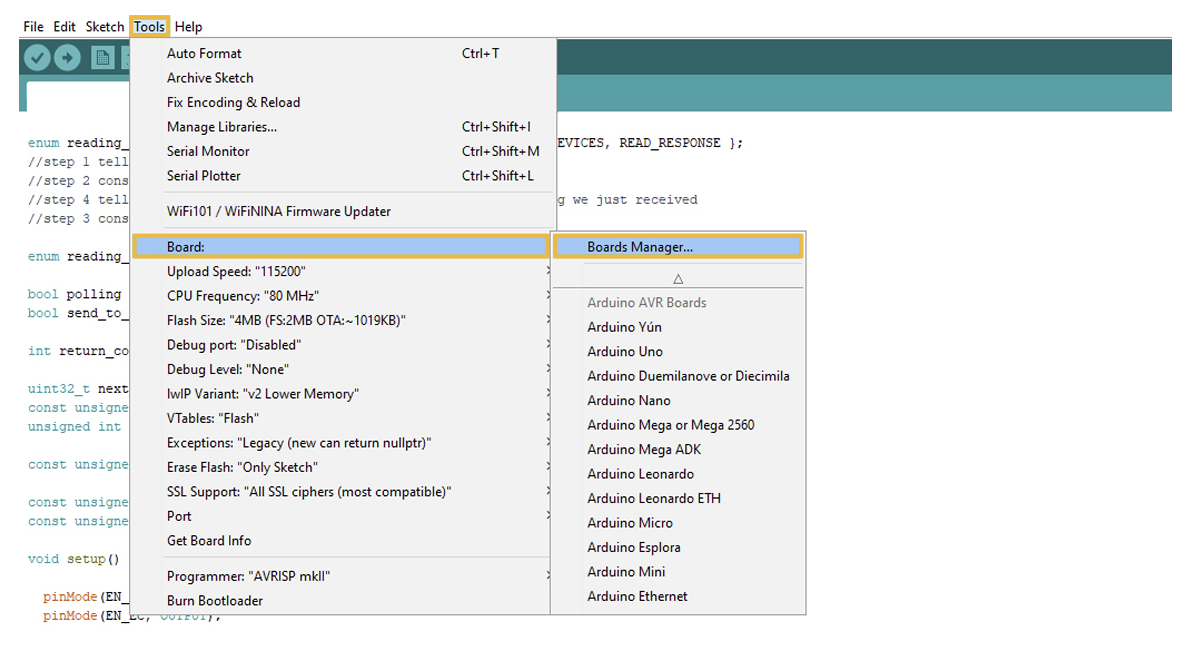
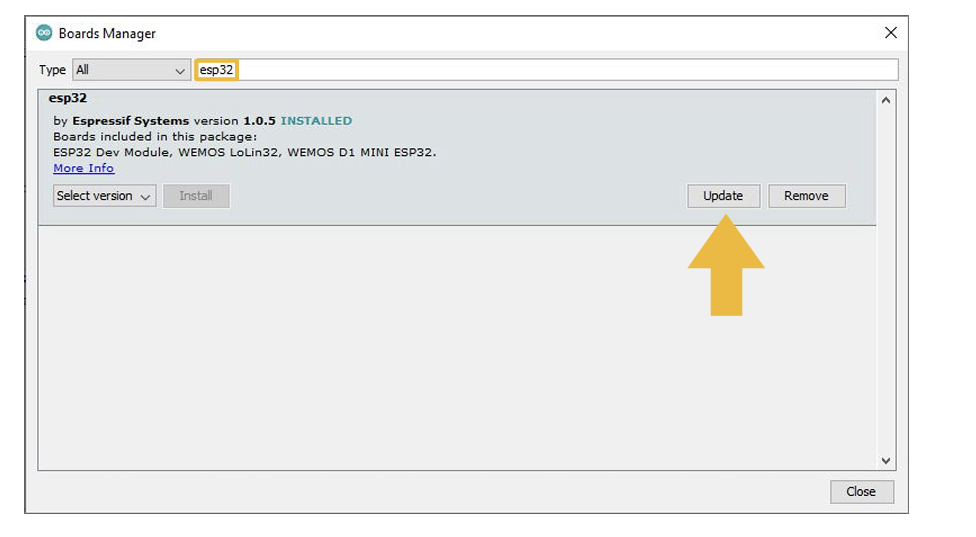
In the search bar of the Boards Manager, lookup esp32. Update to the most recent version if you do not already have it.