|
|
1 month ago | |
|---|---|---|
| data | 2 months ago | |
| images | 2 months ago | |
| sensors/HTU21D | 2 months ago | |
| .gitignore | 2 months ago | |
| PaginaResultado.png | 2 months ago | |
| README.md | 1 month ago | |
| RaspberryPi4_Sensor_PinMap.jpg | 2 months ago | |
| index-css.html | 2 months ago | |
| index.html | 2 months ago | |
| index.nginx-debian.html | 2 months ago | |
README.md
Raspberry Pi 4 Temperature & Humidity Monitoring System (HTU21D)
Project Overview
The Temperature-Humidity-Sensor is the first module in a series of sensors for GNU/Linux intended for the construction of weather microstations that will be responsible for measuring air quality. This module monitors temperature and humidity in real time using a Raspberry Pi 4 and an HTU21D sensor. The sensor reads the environmental data, sends it via I2C, processes it with a C program, and displays the results on a web dashboard using Nginx.
Objective
The objective is to learn about the development of drivers to establish communication between a sensor (hardware) responsible for collecting data and a set of programs (software) that process this data, and design a target compatible with a Raspberry Pi 4 to create weather microstations responsible for monitoring air quality.
System Architecture
The module is designed as a simple data channel where we connect the sensor HTU21D to a web interface for real-time data visualization. As follows: HTU21D Sensor → I2C → C Program → JSON File → Nginx → Web Browser
The sensor collects temperature and humidity data, sends it via the I2C Protocol to a Raspberry Pi 4, which reads and converts it into temperature and humidity values using a C program,then stores them in a JSON file. Nginx serves this file along with the web interface (HTML), where a JavaScript script fetches the data and updates the displayed values in real time.
Materials
Hardware
- Raspberry Pi 4
- HTU21D sensor
- Jumper wires (female-to-female)
- MicroSD card with Raspberry Pi OS
- Power supply
Software
- Raspberry Pi OS / Debian
- GCC compiler
- i2c-tools
- libi2c-dev
- Nginx
- Git
Hardware Connections
Pin Reference Images
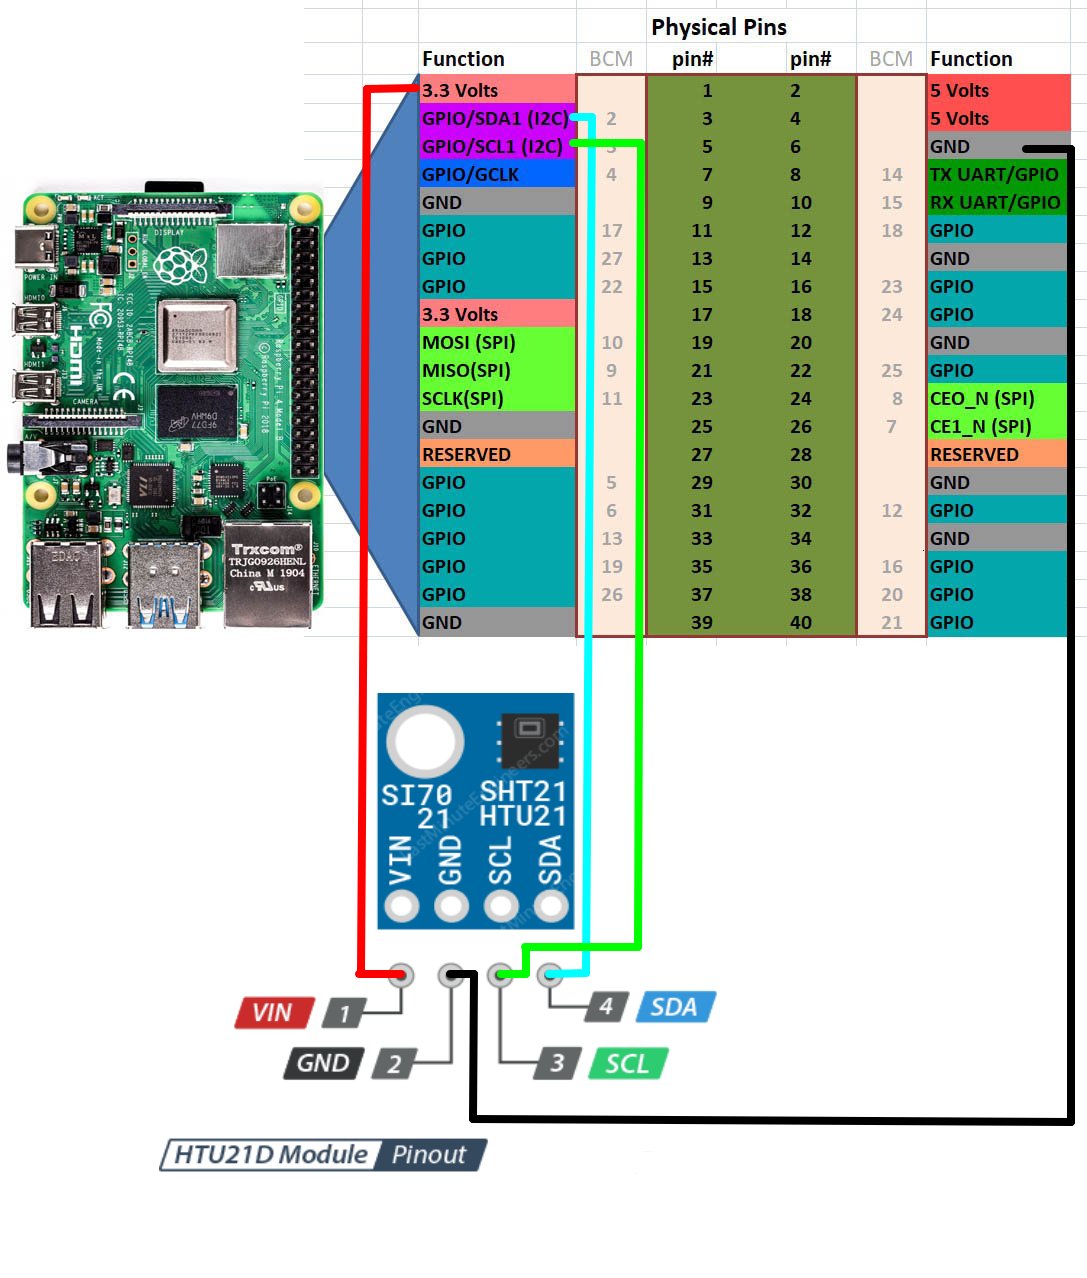
Wiring Table
| HTU21D | Raspberry Pi 4 |
|---|---|
| VCC | 3.3V |
| GND | GND |
| SDA | GPIO2 (SDA) |
| SCL | GPIO3 (SCL) |
Deployment Guide (From Scratch)
1. Install Dependencies
sudo apt update
# Updates package list

sudo apt install gcc i2c-tools libi2c-dev nginx git
# Installs compiler, I2C tools, web server, and Git
2. Clone the Repository
git clone https://gitea.itmorelia.com/Verano-Delfin-2026/Temperature-Humidity-Sensor.git
# Downloads the project from the server

cd Temperature-Humidity-Sensor
# Enters the project folder
3. Enable I2C
sudo raspi-config
# Opens Raspberry Pi configuration menu
Go to:
Interfacing Options → I2C → Enable
sudo reboot
# Restarts system to apply changes
4. Verify Sensor
i2cdetect -y 1
# Scans I2C bus for connected devices
Expected:
0x40
5. Compile the Sensor Program
cd sensors/HTU21D
# Move to sensor source code

gcc main.c htu21d.c -o HTU21D -li2c
# Compiles the program and links I2C library
6. Deploy Web Files
sudo cp -r ~/basic-ui-dashboard/* /var/www/html/
# Copies project files to Nginx directory
sudo mkdir -p /var/www/html/data
# Creates folder for JSON output
7. Set Permissions
sudo chmod +x /var/www/html/sensors/HTU21D/HTU21D
# Allows execution of sensor program

sudo chown -R www-data:www-data /var/www/html
# Gives Nginx access to files
8. Run Sensor Loop
cd /var/www/html
# Go to web directory

while true; do ./sensors/HTU21D/HTU21D > data/HTU21D.json; sleep 5; done
# Continuously updates JSON every 5 seconds
9. Start Nginx
sudo systemctl start nginx
# Starts web server

sudo systemctl enable nginx
# Enables auto-start on boot

sudo systemctl status nginx
# Verifies server is running
10. Get Raspberry Pi IP
hostname -I
# Displays local IP address
Example:
192.168.1.100
11. Access from Another Computer
Open a browser and go to:
http://192.168.1.100
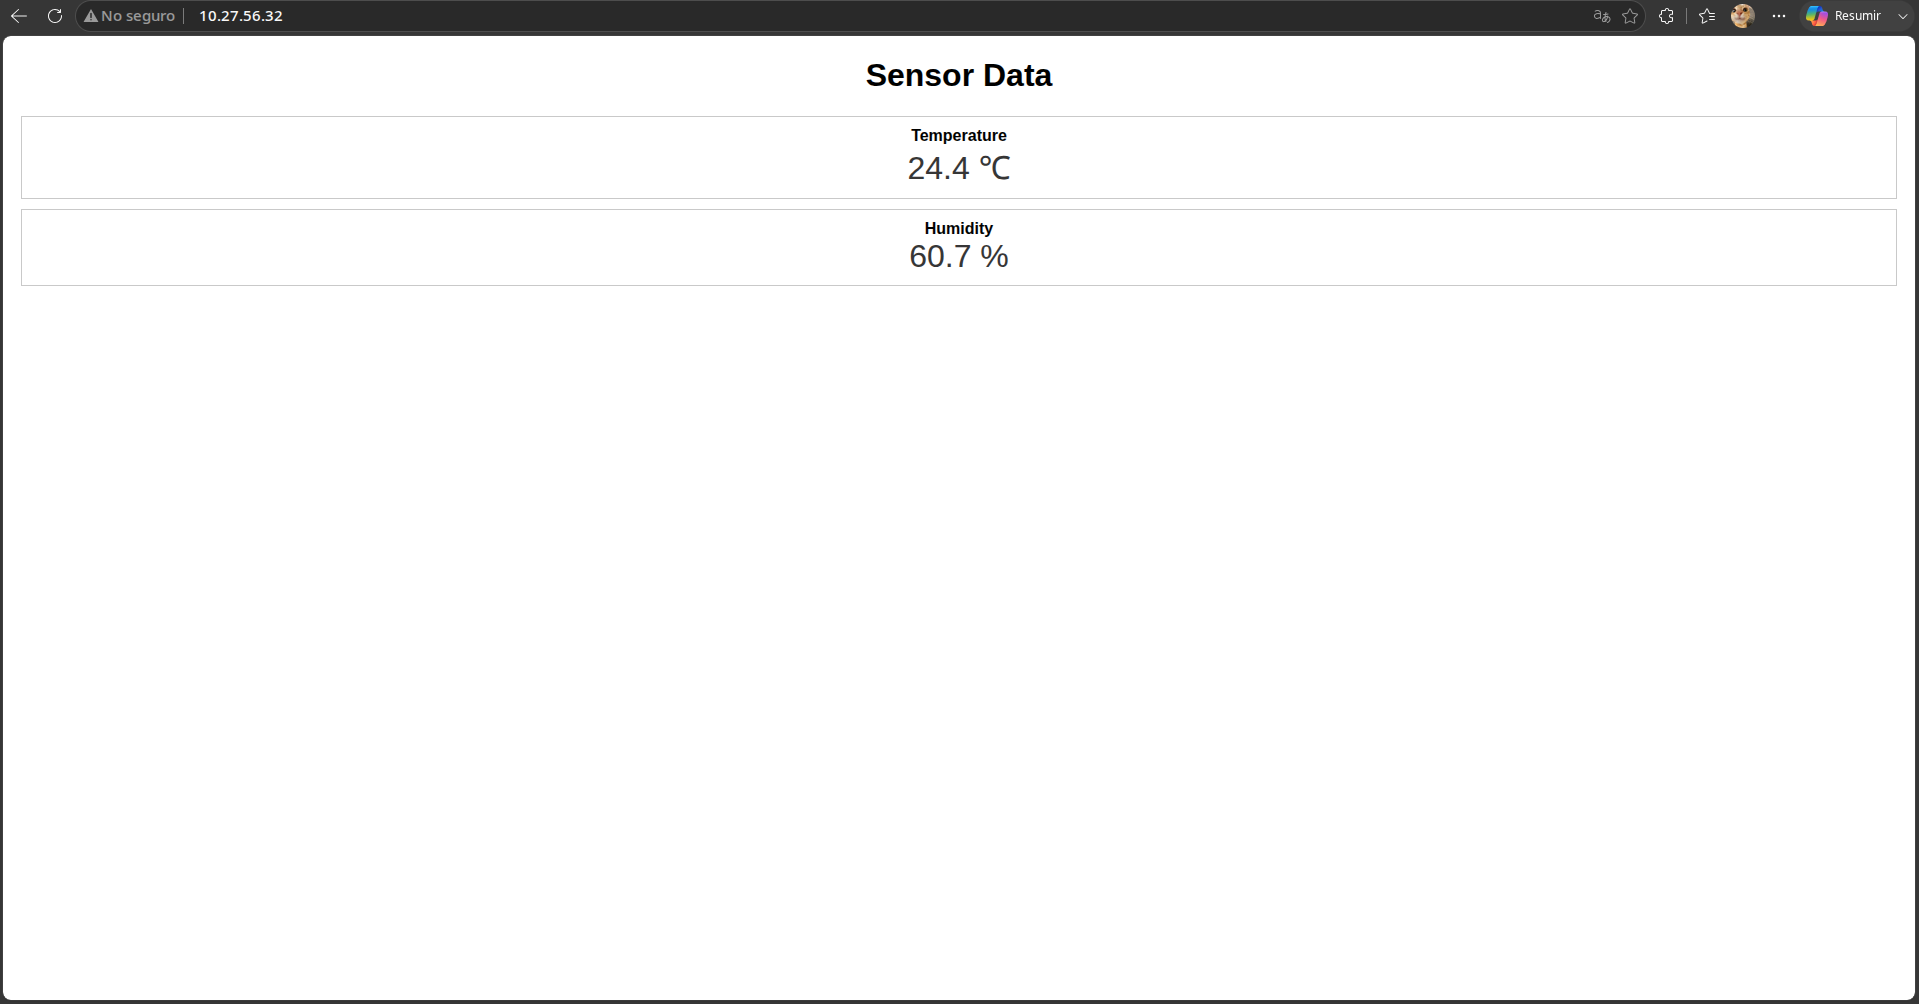
12. Result