|
|
2 months ago | |
|---|---|---|
| data | 2 months ago | |
| images | 2 months ago | |
| sensors/HTU21D | 2 months ago | |
| .gitignore | 2 months ago | |
| PaginaResultado.png | 2 months ago | |
| README.md | 2 months ago | |
| RaspberryPi4_Sensor_PinMap.jpg | 2 months ago | |
| index-css.html | 2 months ago | |
| index.html | 2 months ago | |
| index.nginx-debian.html | 2 months ago | |
README.md
🌡️ Raspberry Pi 4 Temperature & Humidity Monitoring System (HTU21D)
📌 Project Overview
This project implements a real-time temperature and humidity monitoring system using a Raspberry Pi 4 and an HTU21D sensor. The system reads environmental data via I2C, processes it using a C program, and displays the results on a web dashboard using Nginx.
🧠 System Architecture
The system is structured as a simple data pipeline that connects the sensor, processing logic, and web interface. Data flows continuously from the physical environment to the user in a clear and modular way.
🔹 Hardware and Communication Layer
The HTU21D sensor measures temperature and humidity and communicates with the Raspberry Pi using the I2C protocol. This allows the Raspberry Pi to request and receive raw data from the sensor.
🔹 Data Processing Layer
A C program interacts with the I2C interface to read the sensor data. It converts the raw binary values into human-readable units such as degrees Celsius and percentage humidity, and formats the result as JSON.
🔹 Data Storage Layer
The JSON file stores the latest sensor readings. It acts as an intermediate layer, separating the data acquisition process from the web interface.
🔹 Web Server Layer
Nginx serves the JSON file and the web page over HTTP. It allows other devices on the network to access the system through a browser.
🔹 Presentation Layer
The web page uses JavaScript to periodically request the JSON file and update the displayed values dynamically, enabling near real-time visualization.
🔄 Overall Flow
Data is captured by the sensor, processed by the C program, stored as JSON, served by Nginx, and displayed in the browser. This structure keeps the system simple, modular, and easy to maintain.
🧰 Materials
🔧 Hardware
- Raspberry Pi 4
- HTU21D sensor
- Jumper wires (female-to-female)
- MicroSD card with Raspberry Pi OS
- Power supply
💻 Software
- Raspberry Pi OS / Debian
- GCC compiler
- i2c-tools
- libi2c-dev
- Nginx
- Git
🔌 Hardware Connections
📷 Pin Reference Images
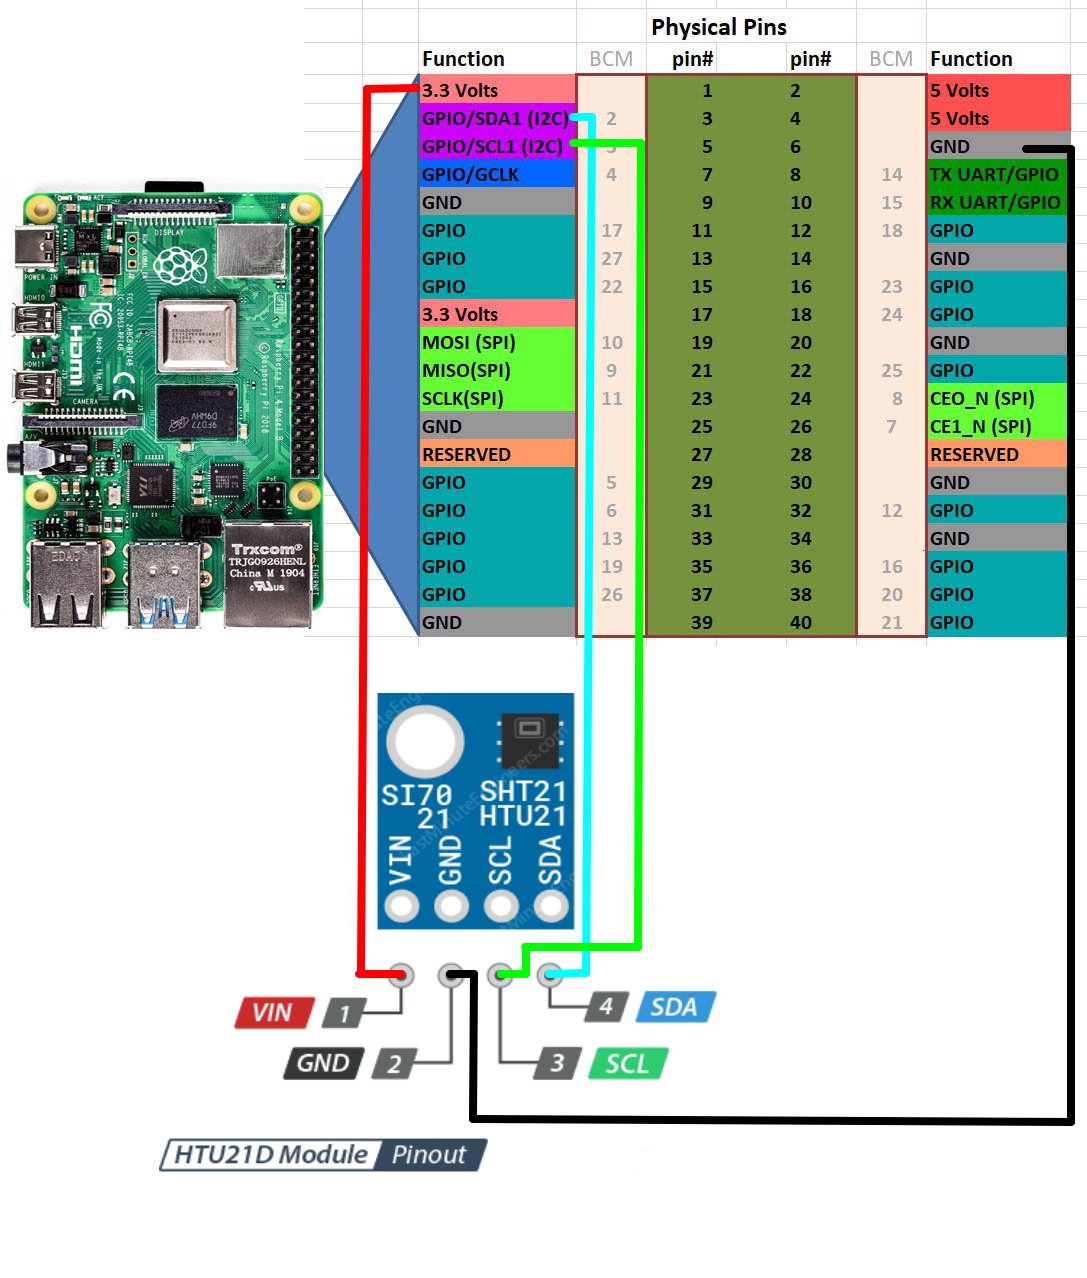
📍 Wiring Table
| HTU21D | Raspberry Pi 4 |
|---|---|
| VCC | 3.3V |
| GND | GND |
| SDA | GPIO2 (SDA) |
| SCL | GPIO3 (SCL) |
🚀 Deployment Guide (From Scratch)
🧰 1. Install Dependencies
sudo apt update
# Updates package list

sudo apt install gcc i2c-tools libi2c-dev nginx git
# Installs compiler, I2C tools, web server, and Git
📥 2. Clone the Repository
git clone https://gitea.itmorelia.com/Verano-Delfin-2026/Temperature-Humidity-Sensor.git
# Downloads the project from the server

cd Temperature-Humidity-Sensor
# Enters the project folder
⚙️ 3. Enable I2C
sudo raspi-config
# Opens Raspberry Pi configuration menu
Go to:
Interfacing Options → I2C → Enable
sudo reboot
# Restarts system to apply changes
🔍 4. Verify Sensor
i2cdetect -y 1
# Scans I2C bus for connected devices
Expected:
0x40
🧑💻 5. Compile the Sensor Program
cd sensors/HTU21D
# Move to sensor source code

gcc main.c htu21d.c -o HTU21D -li2c
# Compiles the program and links I2C library
📂 6. Deploy Web Files
sudo cp -r ~/basic-ui-dashboard/* /var/www/html/
# Copies project files to Nginx directory
sudo mkdir -p /var/www/html/data
# Creates folder for JSON output
🔐 7. Set Permissions
sudo chmod +x /var/www/html/sensors/HTU21D/HTU21D
# Allows execution of sensor program

sudo chown -R www-data:www-data /var/www/html
# Gives Nginx access to files
▶️ 8. Run Sensor Loop
cd /var/www/html
# Go to web directory

while true; do ./sensors/HTU21D/HTU21D > data/HTU21D.json; sleep 5; done
# Continuously updates JSON every 5 seconds
🌐 9. Start Nginx
sudo systemctl start nginx
# Starts web server

sudo systemctl enable nginx
# Enables auto-start on boot

sudo systemctl status nginx
# Verifies server is running
🌍 10. Get Raspberry Pi IP
hostname -I
# Displays local IP address
Example:
192.168.1.100
🖥️ 11. Access from Another Computer
Open a browser and go to:
http://192.168.1.100
12. Result
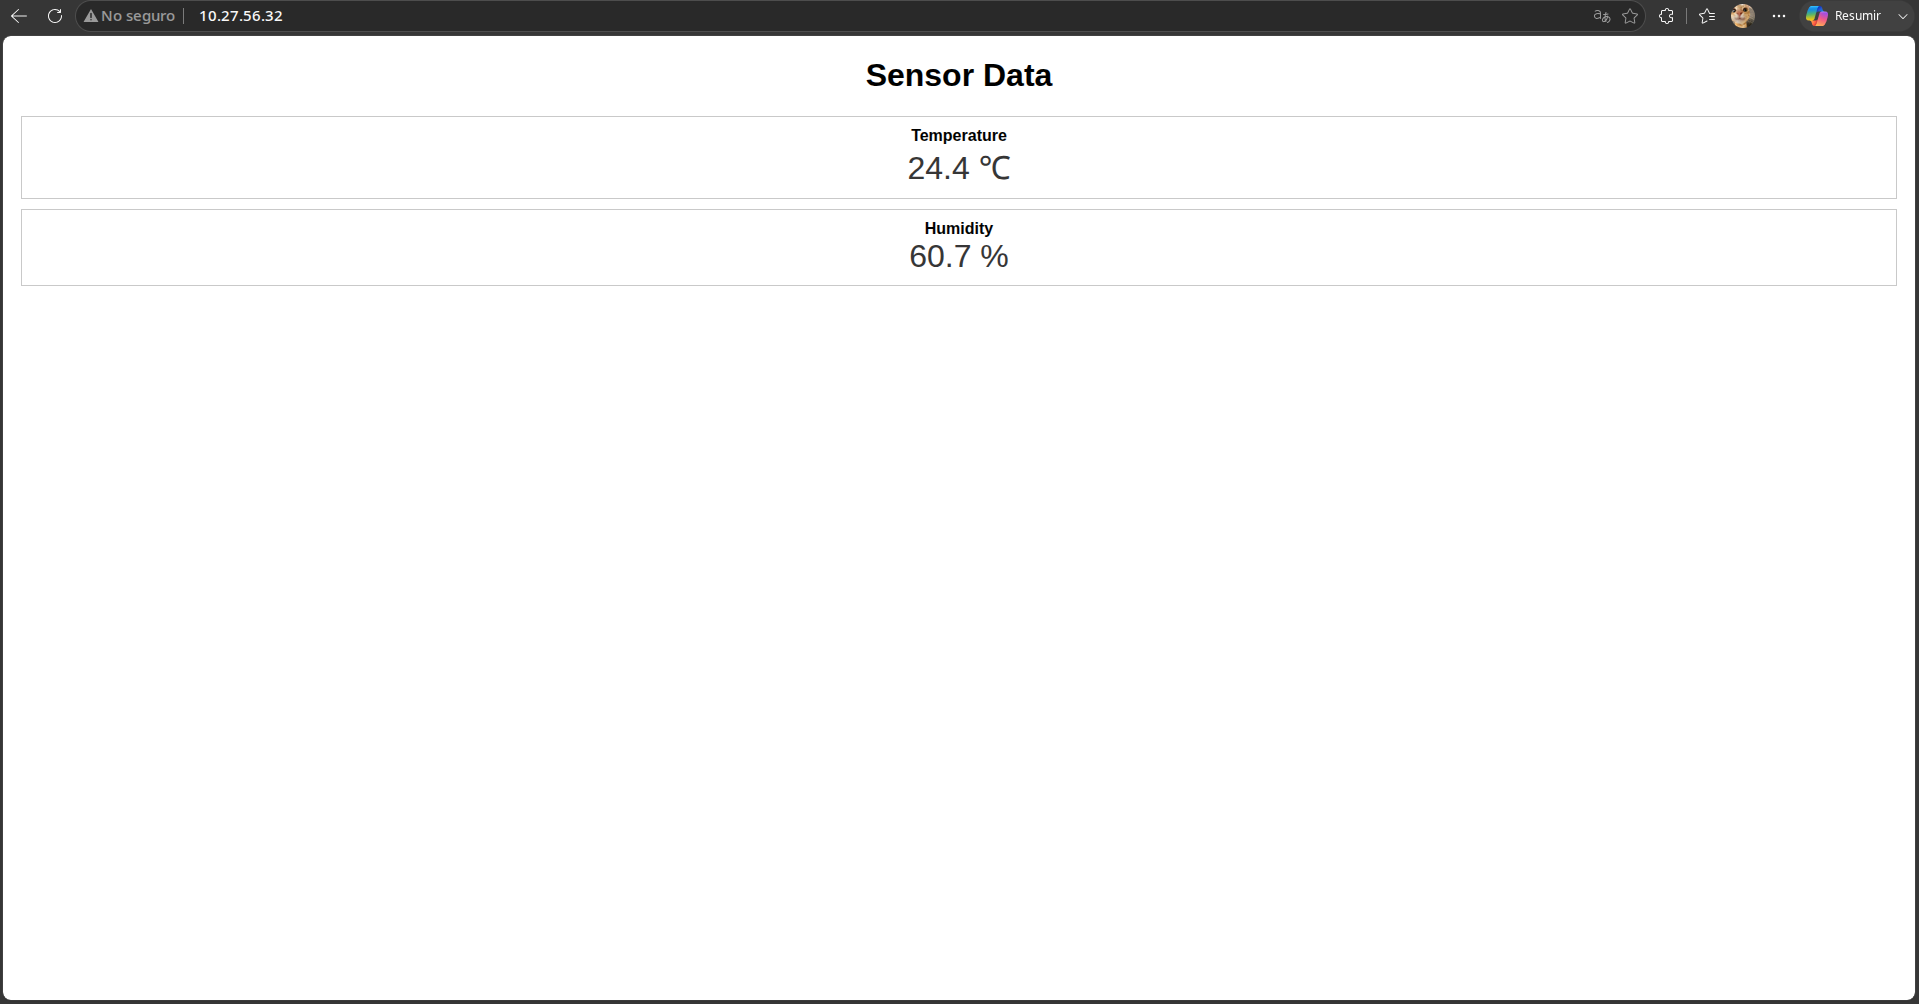
🔄 Real-Time Updates
JavaScript fetch:
fetch('./data/HTU21D.json?nocache=' + Date.now())
What it does:
- Prevents browser cache
- Forces fresh data request
🎯 Conclusion
This project integrates:
- Embedded systems (sensor + Raspberry Pi)
- C programming
- Linux system configuration
- Web development (Nginx + JS)
It demonstrates a complete pipeline from hardware acquisition to real-time web visualization.